Tyre pressure monitors alert you when the pressure drops below or rises above the set range, prompting you to take action and return the air in your tyres to the appropriate amount, significantly extending the life of your tyres
TPMS Tips
A tyre pressure monitor system (TPMS) is an electronic safety system designed to constantly monitor the pressure and temperature of your tyres.
TPMS Shortcuts
To Code Sensors
A. Turn on power switch on the right hand side of the monitor.
B. Hold down CODE button until ‘Beeps’, then let go.
- If un-Coded you see x6F (FFF FFF)
- Press +/– to scroll to the desired position required to be coded.
- Place sensor on the centre of the Monitor screen to be coded.
Note: Ensure other sensors are NOT within 1 Metre of the monitor when coding each sensor.
- Quick Press the CODE button, red light will appear at bottom left hand corner Monitor.
- A Coded sensor will display a unique ID Code. E.g. (4F3 3A5) along with a beep.
- Press +/– to move to the next location on the monitor to be coded if required. Repeat Steps mentioned above to code additional sensors.
Note: If coding is unsuccessful an error will appear (ID-Err). Try coding again, (ensure the battery is 3V or above in the sensor).
- Hold CODE button down for 3 seconds to save and exit, wait for ‘Beep’ to be heard.
To Delete Sensors
- Turn on power on the side of the monitor.
- Hold CODE button down until audible “Beep” sounds.
- Press +/– to move to desired sensor location.
- Press SET for 3 seconds to delete sensor (beep can be heard).
- Once FFF FFF appears, the sensor has been deleted.
- Press CODE button until “beep” is heard to save settings.
To Set Pressures
- Turn on power on side of the monitor.
- Press and hold the set button until “beep” is heard.
- You will see icons for all programmed sensors.
- PSI will appear and be flashing (if on PSI leave, if on BAR press +/– to move to PSI).
- Press SET. C (Celsius) will appear.
- Press SET.
- The first axle will be flashing showing “HIGH PRESSURE” (bottom of display) Press +/– to adjust the pressure to +15 PSI above the pressure you run in your tyres.
- Quick press on SET (do not hold).
- The sensor will be flashing “LOW PRESSURE” (bottom of screen).
- Press +/– to adjust –15 PSI below the pressure you run in your tyres.
- Press SET to move to the next axle and repeat steps 7-10. Press SET for 3 seconds until beep is heard to save and complete pressure parameter settings.
Tyre Pressure Locations

Placing sensors on to tyres
- Screw (brass coloured) nut onto the valve stem (optional), Fig 1.
- Screw sensor onto tyre.
- Using the key spanner provided, tighten the brass nut towards the sensor (which will lock onto sensor)
- May use protective caps (optional)
Attaching the ST-3000 sensors onto your tyres
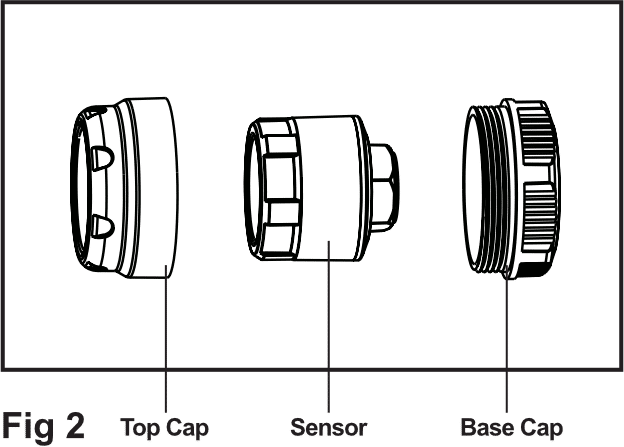
The sensors come supplied with “optional protective caps”. The “protective caps” are a two (2) piece item. If space permits, place base cap onto the valve after the brass nut has been attached to the valve stem then screw sensor onto tyre valve. Finally place top cap over the sensor and screw into the base cap. See Fig 2.


